Chickpea, Sweet Potato & Millet Soup

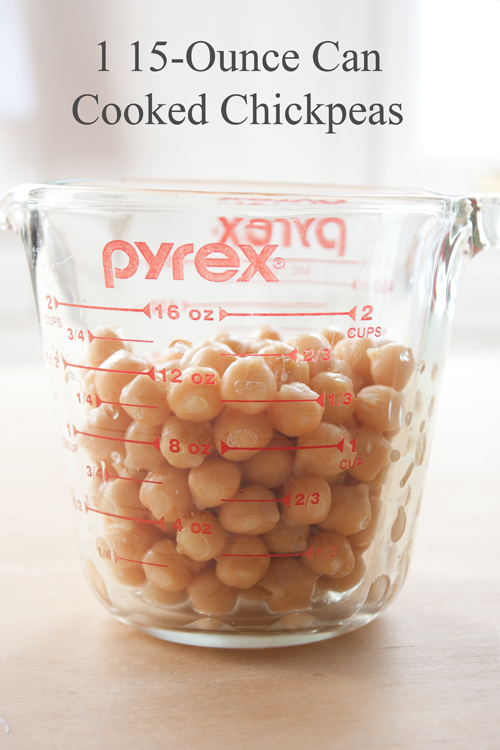
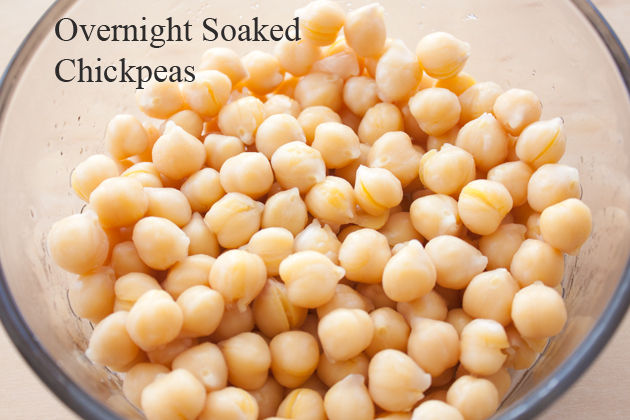
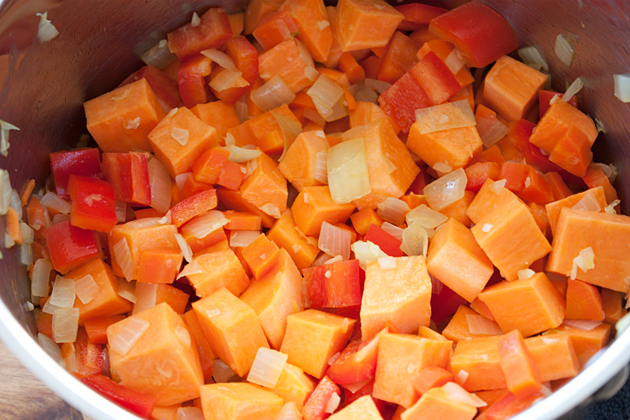
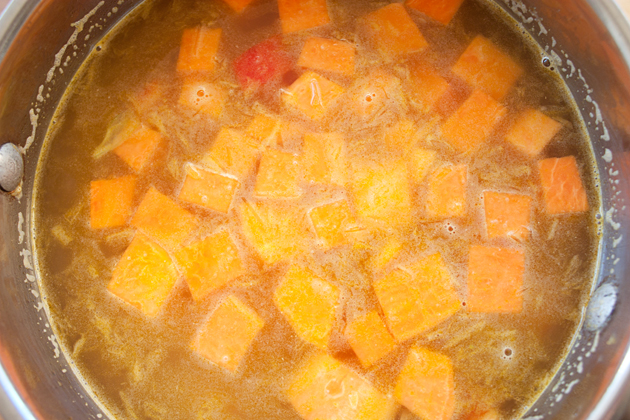
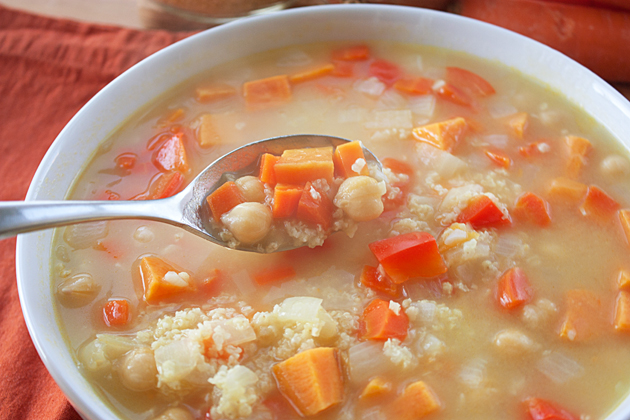
Chickpea Sweet Potato Millet Soup Sometime before the dark cloud of nausea and exhaustion hit, I had made this simple, nourishing soup. This was back in early March (so long ago, I know!) when there was still that occasional chill in the air and I was craving something that would warm my insides. I had some sweet potatoes as well as carrots and red pepper on hand. Plus I had just cooked up a batch of fresh chickpeas that I wanted to incorporate into this dish, and I added the usual onions and garlic along with the not-so-usual millet to complete this dish. So simple, yet incredibly nourishing and tasty. It really is so blazingly easy to put this together and will be on the table in under 30 minutes, but before I get on to how I made it I wanted to first discuss the über-important topic of beans. When I was a poor college student I always cooked my own beans. Then, sometime several years into my post-college career, when money wasn’t so tight, I became lazy. I found myself always grabbing for cans of beans at Whole Foods where I could get a can of organic beans for $.99. I figured time was money and for a decent price I could still get good, quality, organic beans. Rewind back to college years: I had a lot of epiphanies in college as I did a lot of research about food, nutrition, and the crazy chemicals our bodies are exposed to, especially through the food and drinks we consume. It was then, roughly 14 years ago, that first learned of the horrors of BPA. If you don’t know, I’d suggest doing some research, but basically high levels of it, which most Americans have because it’s so rampant in plastics, have been linked to cancer, birth defects (particularly regarding hormone/endocrine systems, and brain and behavior problems). At the time, I only knew of how rampant it was in plastics so I traded in my plastic water bottles and tupperware containers for glass in an effort to reduce my overall BPA exposure. Fast forward to last year: To my horror, I discovered that nearly all cans of canned foods are lined with BPA, which is used to preserve the contents inside (Eden Organic is the only one I know that isn’t). In late 2011 a Harvard study found that participants who ate one serving of canned soup a day (which most said was not enough food for them) for five consecutive days had a 1,221% increase of BPA levels in their urine. Those are some scary high levels, especially when I think of how much canned food I often consume! So around the beginning of this year, I made a commitment to eliminate all BPA-lined canned foods, which was pretty much only beans, from my diet and I started buying them dried again. Through months of doing this, I played with using both the quick-soak method (where you bring them to a boil and cook for two minutes before turning off the heat and letting them sit for two hours) as well as overnight soaking (at least eight hours soaking in cold water) and wanted to share my results regarding the amount and texture these two methods produce. I started with one cup of dried beans, and as the photo indicates, after overnight soaking and quick-soaking for two hours, I ended up with over two cups of beans for each. No big difference there. For each soaking methods, once I had fully cooked them for an hour on the stove, their size still did not increase much, if at all. I was surprised that one method didn’t result in a slightly larger bean and slightly higher yield. During this experiment , I also wanted to do a cost comparison (which is at the bottom of this post) with canned beans because I was curious as to how much money I was saving by not being so lazy and making the switch. To give you a hint, the cost difference is VERY significant. Chickpea Skins While the overnight vs. quick soak method didn’t produce dramatic results in the size of chickpeas, what I did notice was tons of floating chickpea skins in the cooking liquid from the quick-soak ones by the end of cooking. Picking them out is not so much fun and definitely time consuming. Additionally, the quick soaked beans fell apart more, which may be okay for making hummus, but not for when you need the beans whole. It’s possible that you can prevent this by adding salt while they’re cooking, but I’ve always been hesitant to do that because I was trained that adding salt to beans while cooking does not allow them to absorb water leaving you with a tough, hard bean. Also, in general, there is something that I really love about the texture of the overnight soaked ones that’s not present in the quick-soaked ones so as long as I think ahead, I much prefer to soak them overnight. Chickpea Sweet Potato Millet Soup Now that we’ve got that out of the way, onward to how I put this simple dish together. I prepped my veggies, and made sure to have my cooked chickpeas finished. I sauteed my onions, garlic, and carrots for 5-7 minutes or until the onions became translucent. I added the sweet potato chunks and red peppers and sauteed for another minute. I added the millet, sauteed for another minute and then added the veggie broth (note, a good, high-flavor veggie broth is important otherwise you might feel like the flavors of this soup are too mild or bland.) I brought the liquid to a boil and then cooked it partially covered for 15 minutes on medium heat. I added the chickpeas about 3 minutes before the end of cooking time. Lunches After serving myself a bowl and enjoying dinner, I then place the remaining soup in my glass lunch containers to bring to work the next few days. No BPA-coated plastic here! Chickpea Sweet Potato Millet Soup Chickpea, Sweet Potato & Millet Soup serves 4
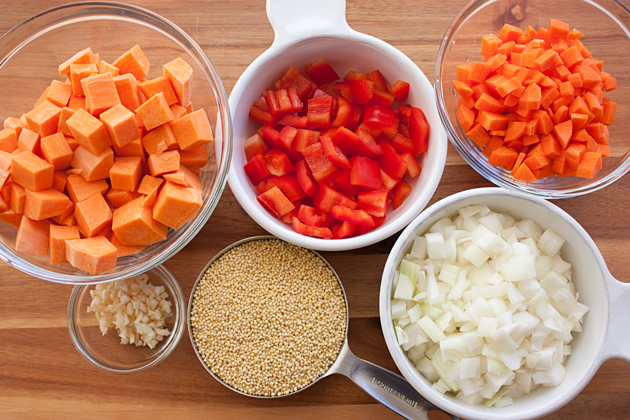
  • 1 tablespoon extra virgin olive oil
  • 1 medium yellow onion, diced
  • 2 medium carrots, diced
  • 3 cloves garlic, minced
  • 1 medium sweet potato, chopped
  • 1 medium red bell pepper, chopped
  • 1 cup millet, rinsed
  • 8 cups vegetable broth
  • 2 bay leaves
  • 1 1/2 – 2 cups chickpeas, cooked and drained
  • salt to taste
  • suggested optional spices if you’re feeling it needs some oomph: dash of cayenne pepper, 1 teaspoon paprika, 2 teaspoons cumin, 1 teaspoon coriander

Saute Veggies: Heat a large saucepan over medium heat and add the tablespoon of olive oil. Once the oil is warm, add the onions, carrots, and garlic. Saute for 5-7 minutes or until the onions are soft and translucent. Add the sweet potatoes and red pepper and saute for another 2 minutes. Add the millet and saute for 1 more minute. Cook: Add the veggie broth and bay leaves and bring to a boil. Cook partially covered for 15 minutes. 3 minutes prior to the end of cooking, add the cooked chickpeas. Cost Analysis of organic BPA-free Dried vs. Canned Chickpeas 3 cups dried chickpeas = 6+ cups cooked chickpeas 3 cups dried (1.24 lbs) @ $2.00/lb = $2.48 1 can Eden organic chickpeas = $2.39 Dried = 6 cups  = $2.48 Canned = 2 cups = $2.39 That’s 3 times the cost to buy canned vs. cooking them yourself! WOWZA!! Over a life time of bean eating that’s a significant amount of savings! Chickpea Sweet Potato Millet Soup

State of the Uterus — June 2013

I thought I should explain my several-month absence…


State of the Uterus Address — June 2013

There have been some new developments. It has come to our attention that there is a foreign inhabitant occupying our homeland. While we had hoped their presence would have minimal effect on daily life, there has unfortunately been a significant impact in the form of relentless days of nausea and exhaustion while we have worked hard to forge a peace agreement as their one-person army continues to grow and strengthen. It has been a VERY challenging 3 months, to say the least.

While it is unfortunate to report any amount of damage has taken place, we are also supremely grateful that the situation hasn’t been worse. There are no signs of a Third World War and it appears the conflict is beginning to ease, though we have also noticed some very rapid expansion from this inhabitant that is likely to cause additional discomfort in the coming months.

A peace treaty has been made by both parties agreeing to a continued, peaceful occupation for the next six months. However, if a withdrawal has not been made by December 15th,  we’re going to need to take some more drastic measures.


Note: This photo was taken nearly two weeks ago and changes seem to be happening rather quickly now.

13 weeks

SOOOOOO… as you can see, I’ve just not been myself lately and spending any amount of time in the kitchen has been pure torture as the smell of  cooking makes me want to vomit. Also, my lack of energy and motivation has left me glued to the couch one too many evenings and the mere thought of writing leaves me feeling exhausted. However, I think things are FINALLY on the upswing so I hope to be back with some new posts soon 🙂

Thousands of Elephant Seals at Año Nuevo State Park

Just 50 miles south of San Francisco along the Pacific Ocean lies Año Nuevo State Park. Years ago it was an important site for the Ohlone people as they lived, hunted and gathered food on the land and from the sea. When the Spanish arrived in the late 1700s the typical colonialization story unfolds where the Ohlone were baptized, forced into Catholicism, and ultimately ended up dying from exposure to European diseases (in addition to other, more violent acts.)

The sadness does not stop there. Not only did the Europeans decimate the Native American population, but years later they also decimated the elephant seal population by hunting them to near extinction for their highly valuable blubber, which was being used to make oil at the time. After years of constant slaughter, only a mere 50-100 elephant seals existed in the world. Legal protections were put in place and through the help of conservation groups that tiny colony was able to grow into the 170,000 elephant seals that exist in the world today.

As their population rebounded many elephant seals decided that Año Nuevo was the perfect place to mate and give birth. In fact, so many had an affinity for this location that, today, Año Nuevo is the largest mainland breeding colony for northern elephant seals in the world. The site is now a protected reserve where you can only visit via a guided tour. It’s one of only three other mainland locations where they come to give birth, nurse, and mate again before heading out to sea for the remainder of the year (coming to shore only one other time to go through a catastrophic molting where they shed all of their fur and skin.) Breeding season occurs from late December through the end of March and I had been crazy eager to witness this amazing event for the past 5 years.

The opportunity to visit finally presented itself several weeks ago when Alex’s parents were in town. Tickets sell out months in advance for weekend tours, but since visiting family is a fine excuse to take a day off from work, we decided to go on a Monday (we still needed to purchase them a month in advance). I also knew that my brother was interested in going so invited him and his family along as well.

Which is why you see Ellie thoroughly examining each of the animal skulls laid out near the entrance to the park.

Deer at Ano NuevoThere are other elephant seal breeding colonies where you don’t need a guide to visit (near San Simeon, for example), but one of the benefits of having a guide is that you get to learn all sorts of interesting facts. For instance, our guide mentioned that her favorite thing about elephant seals is their amazing diving abilities.

Walking to see the elephant seals

To support her proclamation, she explained that when the first tracking device was attached to a female elephant seal in the 1980s, with their eyes glued to the computer, researchers watched in horror as they saw the seal’s heart rate drop to 3 beats per minute (it’s usually 55-120 beats/minute on land.)  The seal was 2,500 feet under water and, as they saw her dropping farther, they thought she had died. Had they killed this poor animal because of the tracking tool?

Lo and behold a few minutes later she came rushing to the surface in perfectly great health. This, researchers learned, is just how far below the water’s surface elephant seals dive in search of food. Can you imagine being that far underwater? It gives me shivers just thinking about how the pressure of it would crush me like an unfortunate ant who found it’s way under my shoe.

Ano Nuevo

If their diving abilities are not enough to make you go “WOW!” then consider their birthing and nursing behaviors. The females come to shore during the months of December through March to give birth to their pups. For the next 28 days straight they consume no food while staying on shore to nurse their young. At the end of 28 days, the mothers have lost 1/3 of their body weight and are then looking to mate and become re-impregnated by an alpha or beta male.

Elephant Seals at Ano Nuevo

Meanwhile, their fragile little pup is expected to head off to sea and learn how to swim, eat fish, migrate, etc. all on their own. “Mama is done with you, little one!” With these kinds of nurturing tactics, perhaps it’s not too surprising that only half of all pups will survive their first year of life.

Elephant Seals at Ano Nuevo

As for the males, they actually fast even longer — 3 months — during mating season as they compete against other males to achieve alpha or beta male status. You see, you must be an alpha or beta male in order to mate with the ladies and only 1 in 10 of all males will be so lucky as to achieve such status in their lifetime. Oddly, it saddens me that 90% of bulls will never get a chance to mate in their life, while the other 10% will get it all. This is how a single male is capable of impregnating up to 50 females in one season and how they can sire over 500 pups throughout their life.

The day we visited in early February there were over 3,000 seals enjoying the beaches of Año Nuevo— males, females, and pups. The hike out to the point is about a mile and a half, producing ample time for a significant build up of anticipation. As we crested over the sandy hills and had our first glimpse of this large colony, I gasped and said “Oh. My. Goodness.” under my breath.

Ano Nuevo Elephant Seals

It almost felt like I was viewing the scene before me in a movie theater — a large IMAX screen with amplified surround sound.

Watching the elephant seals from a distance

We saw them kicking up sand, snorting loudly, nursing young, engaging in fights of supremacy, and, most of all, basking in the sun.

Thousands of elephant seals at Ano Nuevo

From afar, in photos, they look like giant logs that have drifted to shore.

Elephant seals at Ano Nuevo

But when you’re there you can witness events like this where an alpha male chases other competing males to the sea away from his harem.Thousands of elephant seals at Ano Nuevo

We all watched in awe.

There were three different viewing sites we went to that day.

Guided walk to see elephant seals

Here we are trekking along the sandy dunes to the third site.Caves through the cliffs

There were fewer numbers of seals at the last location, but there was an interesting outcropping of land that had several caves cutting through it. which you can just barely see in this photo.

Climbing the fence to see the seals

Alex noticed a mama, pup, and daddy seal on the beach nearby, but the only way to view the massive male was to climb the fence, which even Alex’s mom was excited to do.

Male Female and Pup Elephant Seals

Here you can see the mama and pup together in the center with the father in the bottom right of the photo. Another interesting fact about elephant seals is that they have one of the greatest incidences of sexual dimorphism of any mammal. Males are often three times larger than females with an average male weighing 5,000 pounds (yes, that is heavier than your average car!!) and 14 feet long while females are typically only 1,400 pounds and 11 feet long.

Guided walk to see elephant seals at Ano Nuevo

After a two hour hike and tour we headed back to our vehicles in the parking lot.

Family at Ano Nuevo

On the way there we stopped for a photo as Zack (my brother) offered to snap one of the four of us. It’s not every day Alex’s parents come to visit all the way from Michigan so it’s nice to document the occasion!

Walking back to the parking lot at Ano Nuevo

Coastal Trail Hike

Coastal Trail Views

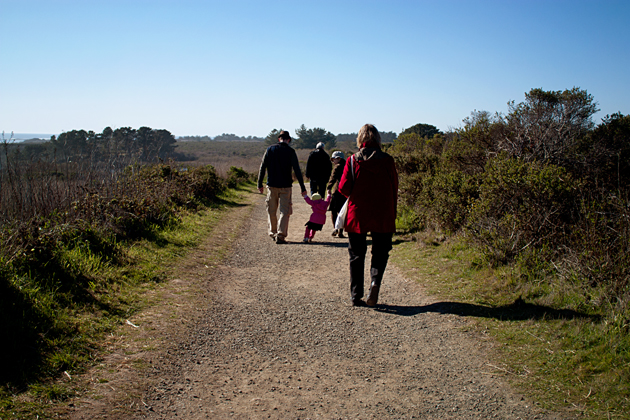
There are sooo many things I LOVE about living in the Bay Area. I could ramble on all day about the numerous things, but the two that I was reminded of while hiking two weekends ago are the pleasant year-round weather and the amazing natural beauty.

Ever since I moved here eight and a half years ago I’ve been completely smitten; so smitten that I practically kiss the ground on which I walk every day in appreciation for how glorious it is. So smitten that I’m okay with the fact that Alex and I have been outbid on several houses by waaaaay over the asking price. I get it. Everyone else is just as crazy smitten and wants their piece of the Bay Area too. And, to me it’s worth it. It’s worth it when everything else here creates so much intense joy. It’s a kind of happiness that feels like a warm blanket as it swells around my heart giving me a sense that all is right in the world. At the same time this happiness produces flutters of excitement in my heart like a teenager in love for the first time. These two feelings coupled together create such an intensity bursting from my core that you just may find me doing heel clicks as I hike down the trail.

Muir Beach EntranceTo soak in all of this amazing natural beauty and experience the fantastic February weather (both of which produce those intense feelings of gratitude), Alex and I went on the Coastal Trail hike in Marin; just 20 minutes outside of the city. The hike starts at Muir Beach.

Muir Beach BoardwalkAfter disembarking from the car we walked through the parking lot heading south. We walked over the boardwalk, took a left (going right will take you to the beach), and then started to make our ascent over Muir Beach.

Muir Beach from Coastal Trail

After huffing and puffing our way up the hill, we were graced with a view high above Muir Beach. This too took our breath away, but in a completely different way.

Coastal Trail Hike

When we glanced to our left, southward, we saw more gorgeous coastline. We kept hiking for a mile or so with significant elevation changes keeping our hearts pumping until you we started to make a side-trip down to Pirate’s Cove. Apparently Pirate’s Cove was a staging area for bootleggers in the 1920s, but I can’t quite imagine why when it seems like such an inconvenience to get there… or perhaps that’s precisely the reason?

Pirates Cove WavesAs we made our way down to the beach, I enjoyed watching the waves come crashing to the shore. Farther out, you can see a wave hitting that large rock in the center.

Pirates Cove Waves

And then make its way closer to shore covering the nearby rocks.

Pirates Cove Waves

As the water swishes around lapping against the rocks it lends itself to a soft, foamy look.

Pirates Cove Waves

And then, finally, the water recedes back to the ocean exposing all of the newly wet, shiny rocks.

Alex at Pirate's Cove

Before heading back up the hill, Alex climbed on this rock and tested his balance in what he likes to call “crane pose” even though there is an actual yoga pose already with that name and it looks nothing like his version. I think he’s going to have to come up with a better name 😛

The couple in the photo asked me where the Cove was and I said, “Isn’t this it?” “Ah, you’re as lost as we are,” was their response. Well, I didn’t really feel all that lost, but their comment left me questioning whether we had truly reached Pirates Cove. There was no sign saying so, but no other path down to a beach that we came across…unless we missed something.

Me and Alex on Coastal Trail Hike

As we made our way back to the main trail by climbing many steps two women approached us and asked if we wanted a picture of the two of us and, of course, we took them up on the offer.

Coastal Trail Cliff Marin California

We continued on and eventually came to this plateau where we could see for miles and miles in several directions. Here the trail appears to lead you off the cliff.

Pathway to the Edge

Eeeek! Probably not a good position for those who have a fear of heights.

Alex on the edge of a cliff

Here you can somewhat see how much Alex is on the edge of a cliff and how far down it is.

Lunch on the Coastal Trail

We decided to sit down for a mid-hike lunch break while soaking in the expansive views.

Lunch on the Coastal Trail

It was so peaceful.

Coastal Trail Views

I could have basked in the sun all day admiring the impressive vista.

Coastal Trail Views

Yep. All day.

Others Lunching on Coastal Trail

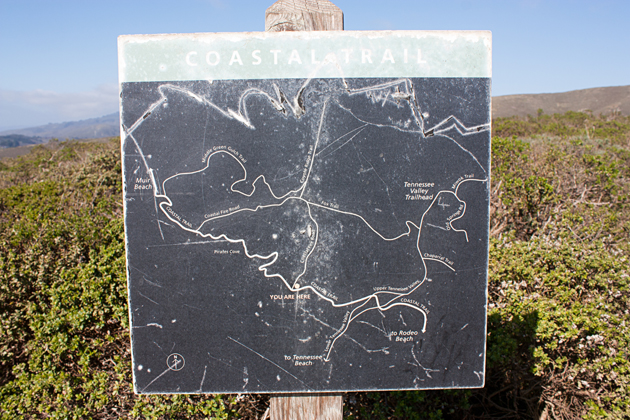
A few other hikers had the same idea, but by then it was onward for us so we set out back on the trail and came across another trail map.

Coastal Trail MapIf your eyes are sharp enough you may be able to see the trails we took. We started on the far left at Muir Beach and hiked along the Coastal Trail, took a quick detour down to Pirate’s Cove and then continued on Coastal Trail and stopped for our lunch at the point where it says: “YOU ARE HERE.” This is where we turned inland on Coastal Fire Road and took that loop around back to Coastal Trail. As you can see, there are many possibilities for longer hikes. This particular route was roughly around 5 miles.

Hiking Coastal Fire Trail

This is the beginning of Coastal Fire Road.

Cyclist on Coastal Fire Trail with San Francisco in the Background

When I turned to look to my right, I was taken aback by being able to see the tallest skyscrapers in the city peaking out between the dip in the hills. I’d love to see this view on a clearer day.

Hiking Coastal Fire Trail

We continued on Coastal Fire Road and, despite appearing to be inland, it still offered stunning views of the mighty Pacific.

Hiking Coastal Fire Trail Overlooking Muir Beach

It wan’t until we kept descending for miles that I realized just how much we had climbed during the first half of the hike. No wonder it kicked my ass.

Hiking Coastal Fire Trail Overlooking Muir Beach

As we connected back with the Coastal Trail we saw our launching point, Muir Beach, and continued down the hill to our car. Overall, this was an awesome hike and I highly recommend it. In fact, I want to go back and explore other trails. We were in a time crunch this particular day to look at open houses for those unreasonably expensive homes I mentioned earlier. But these sorts of adventures are a good reminder of why we live here and why the cost of living is so, understandably, high.

Sautéed Hearts of Palm and Tomato Salad

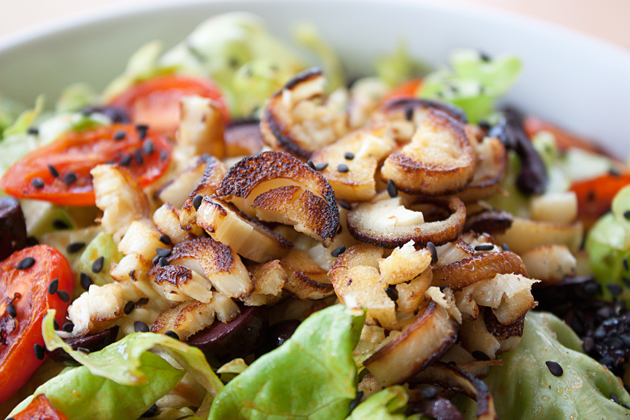
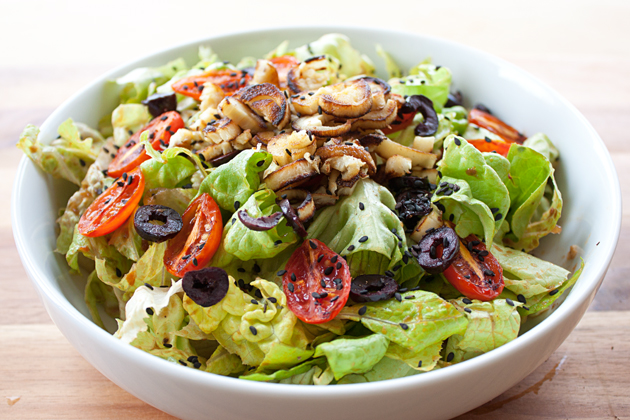
Sautéd Hearts of Palm, Grape Tomato, and Kalamata Olive Salad with Sun Dried Tomato Dressing

January is the month where cookies become “so last year” and lighter fare is all the vogue. All of the New Year’s resolutioners are hitting the gym while noshing on greens and fruits as they seek to sculpt their bodies and create a better version of themselves.

While I am not one to set a New Year’s resolution (though I do look back at the past year and set some goals for myself in the coming year), I too was feeling weighed down from the unrelenting number of cookies I was *forced* to eat the several weeks prior. I had finally woken up from my holiday cookie coma and my body was suddenly craving some nutritious, fresh veggies.

However, with the coolish weather I was also craving something that warmed my belly and after scrounging around my kitchen I found a jar of hearts of palm sitting in my pantry and thought “how would these guys taste sautéed in olive oil?!” When I began salivating at the thought I was certain the result would be awesome and then wondered why preparing them this way had never occurred to me before. You see, I have eaten hearts of palm cold in a salad many times before (I had a lot of it during a vacation in Brazil) and I’ve also puréed it in a hot soup (often with asparagus). But sautéing it? Never even occurred to me.

And now that I’ve done it, I’m over the moon in love with it! I actually wake up in the morning craving it. I’m obsessed, OBSESSED with it. To that, I must offer a word of caution that you may develop a healthy obsession (pun intended) if you too decide to try it. Don’t say I didn’t warn you. 😉

So now I’m curious. What are your favorite ways to prepare hearts of palm? Is sautéing a new concept to you too? Or perhaps hearts of palm are a new food altogether?

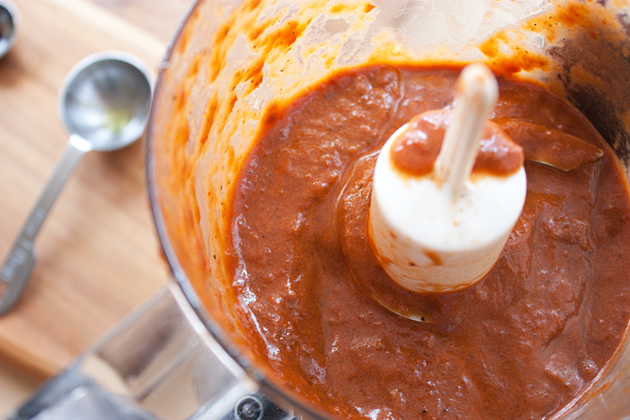
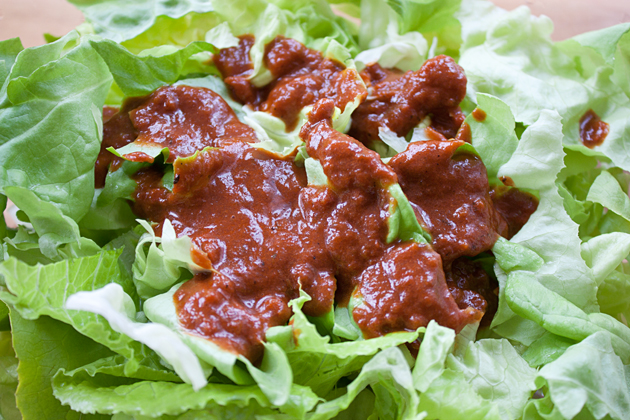
As for how I put this delicious salad together; you first need to blend all of the dressing ingredients in a small food processor or blender until smooth.

Wash and then chop your romaine and butter lettuce into bite size pieces. Cut your hearts of palm and olives into thin slices and then halve your grape tomatoes lengthwise.

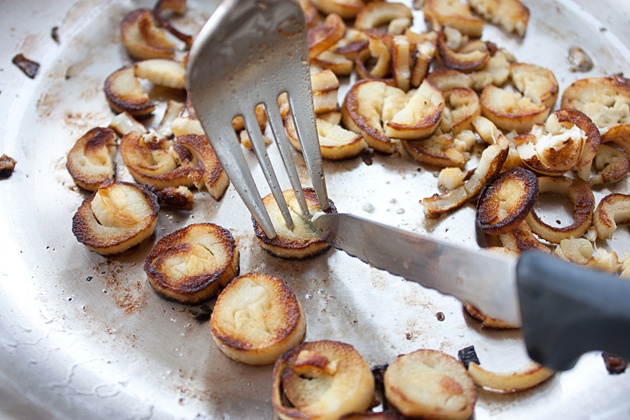
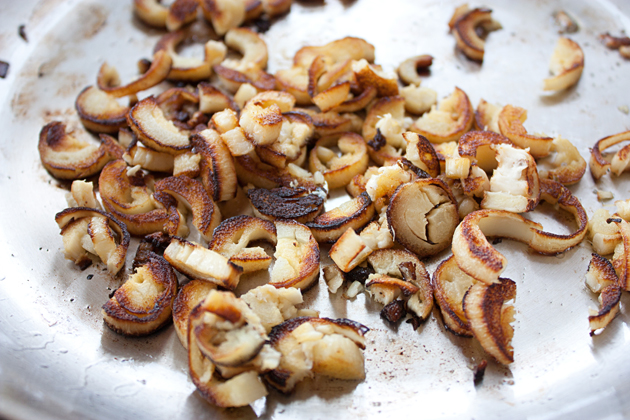
In a medium sauté pan, heat the extra virgin olive oil over medium-high heat and then add the hearts of palm slices in a single layer. Sauté until the bottom becomes brown and slightly crisp. Turn over and do the same to the other side. Also, I periodically prodded and moved each slice to make sure that it wasn’t sticking to the bottom of the pan while they were cooking.

Then cut each slice in half and set aside.

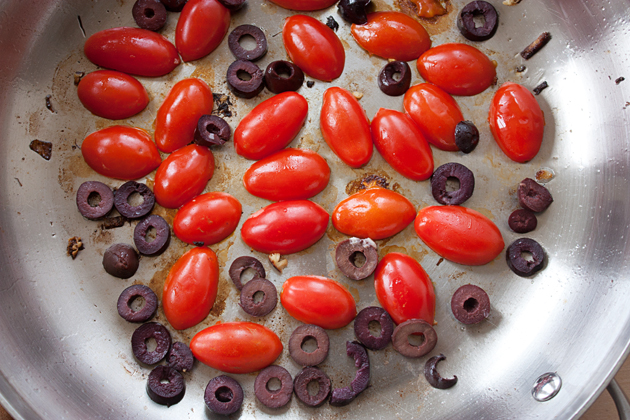
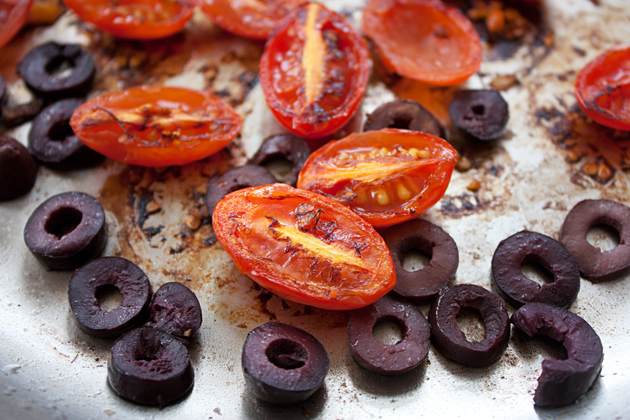
Heat the other tablespoon of olive oil over medium-high heat in the same sauté pan and add the olives and tomatoes cut-side down.

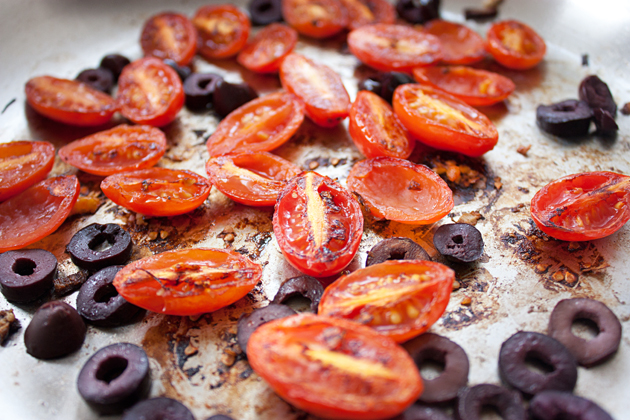
Cook until the tomatoes start to brown and become slightly crisp and then set them aside.

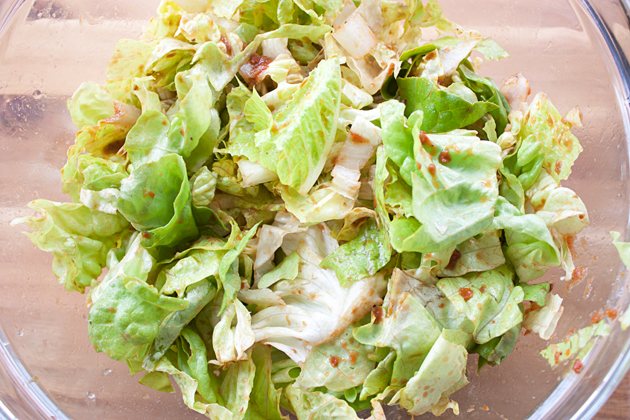
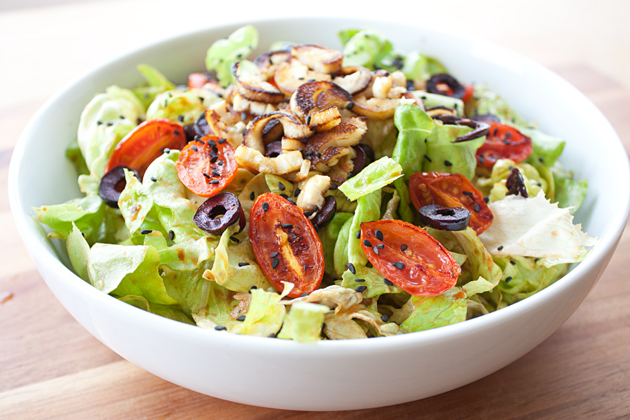
Place the lettuce in a large bowl and add several tablespoons of dressing. With your super clean hands, toss the dressing with the lettuce until each piece is evenly coated. Distribute the lettuce evenly between two large salad bowls and then top each bowl with the tomatoes, olives, and hearts of palm. Add a sprinkle of black sesame seeds on top.

Sauteed Hearts of Palm, Grape Tomato, and Kalamata Olive Salad with Sun Dried Tomato Dressing

Sautéed Hearts of Palm and Tomato Salad

Serves 2

Dressing

  • 2-3 tablespoons extra virgin olive oil
  • 1/2 teaspoon capers
  • 4 sun-dried tomatoes, packed in oil
  • 6 tablespoons water
  • 1 teaspoon balsamic vinegar
  • salt and pepper to taste

Salad/Veggies

  • 3 cups romaine lettuce, rinsed and chopped
  • 3 cups butter lettuce, rinsed and chopped
  • 2 tablespoons extra virgin olive oil
  • 4-5 hearts of palm sticks, sliced
  • 1/2 cup grape tomatoes, sliced in half lengthwise
  • 6 pitted kalamata olives, sliced
  • black sesame seeds
  • freshly ground black pepper

Dressing: Place all dressing ingredients in a blender or small food processor and blend until smooth. Set aside while you prepare the veggies.

Sauté Veggies: Heat 1 tablespoon of extra virgin olive oil in a medium skillet over medium-high heat. Add the hearts of palm in a single layer and sauté for several minutes until they start to brown on the bottom. Make sure to keep moving them around every so often while cooking to prevent them from sticking to the pan. When they’ve browned on the bottom, flip them over and sauté until the other side begins to crisp and is just as brown. Remove from the heat and cut the slices in half. Set aside. Heat the other tablespoon of oil in the same skillet over medium-high heat. Then place the sliced tomatoes face down and add the olive slices. Sauté until the underside of the tomatoes begin to brown. Turn off the heat and set aside.

Assemble: Place the romaine and butter lettuce in a large bowl. Add several tablespoons of the reserved dressing and toss to coat all leaves evenly.  Distribute the lettuce into two separate bowls. Top each with the sautéed tomatoes, olives, and hearts of palm. Lastly, sprinkle with black sesame seeds and freshly ground black pepper.

Sauteed Hearts of Palm, Grape Tomato, and Kalamata Olive Salad with Sun Dried Tomato Dressing

Vegan Cream-Filled Ginger Molasses Cookies

Vegan Cream-Filled Ginger Molasses Cookies

It’s DECEMBER!!! Bring on the Holidays! And the cookies. Piles and piles of cookies. At least that’s what happens in my house during the holidays.

I become a baking fiend, and ultimately, providing a constant source of tummy ache for Alex. So this year I promised that I’d share my baking heroics with co-workers and friends so that we weren’t solely burdened with eating every last one of them — oh, the chore! 

When it comes to baked goods, nothing says the holidays to me like ginger molasses cookies — that spicy aroma filling your house as they bake and then that rich molasses flavor bursting in your mouth with every bite.

These tasty cookies are an annual tradition for me, however, this year I decided to kick them up a notch by adding a buttercream filling and making them sandwich cookies. Don’t get me wrong. They’re perfectly good in their own right so if you want to skip the creamy filling feel free to stop short of that step and eat them straight-up. You’ll enjoy them just as much.

Vegan Ginger Molasses Sandwich Cookies

As I mentioned above, to save me and Alex from a perma-tummyache, I will be spreading the cookie love among co-workers and friends this month. To that, I thought it would be interesting to get anonymous feedback about each cookie rating them on a scale from 1-5 (5 being the best) via a survey. And for the Cream-Filled Ginger Molasses cookies, the survey says:

A solid

There was only one vote less than 5 (which was a 4) so it’s safe to declare these a winning cookie — a go-to cookie for all types of people (the young, the middle-aged, the old, etc.) with varying palettes. A solid choice for a potluck or any kind of event with lots of people.

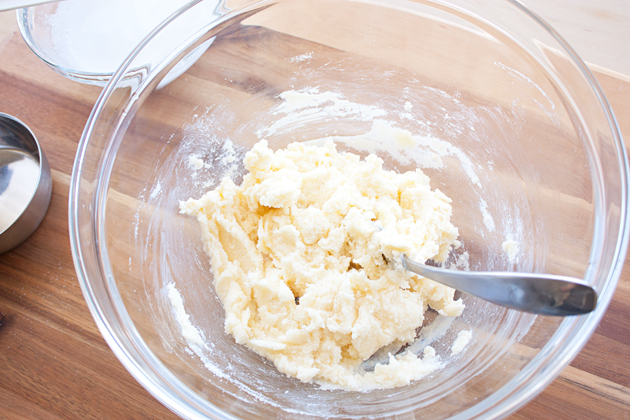
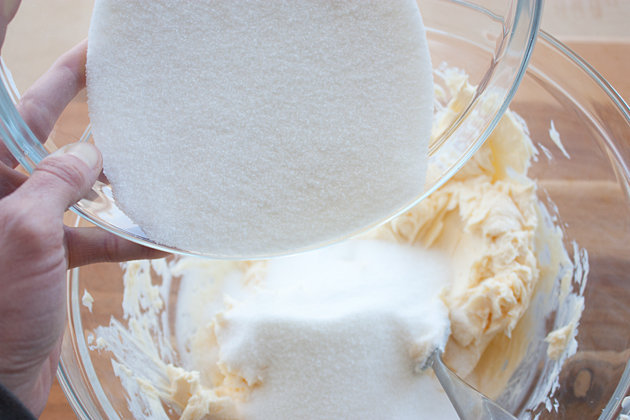
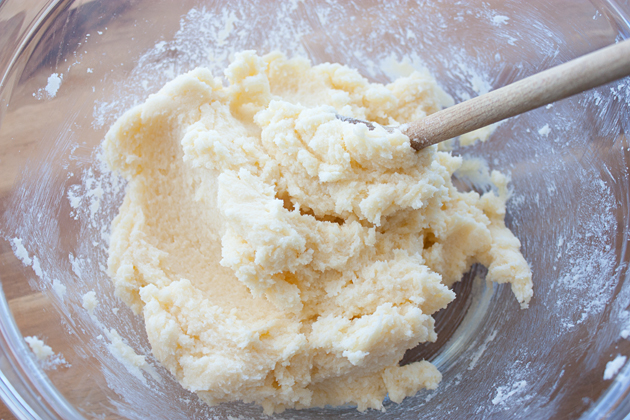
You first want to cream your Earth Balance and granulated sugar in a large bowl.

Add your egg replacer egg…

And molasses and stir to combine.

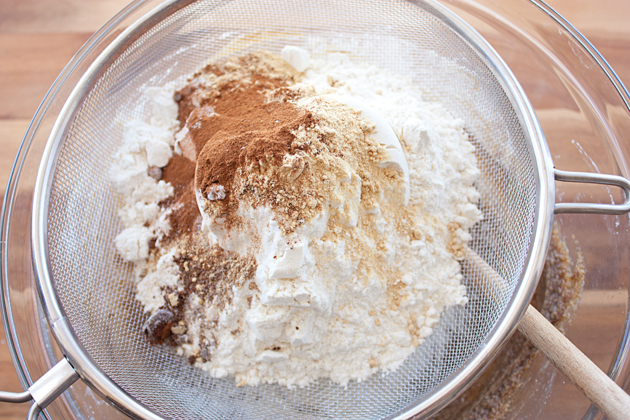
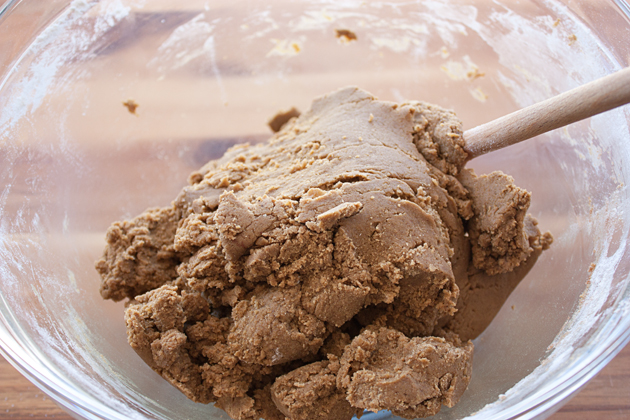
Add the sifted flour, baking soda, and spices and then stir them all together until well-combined.

With a cookie scoop measure the dough into evenly sized balls and roll them between your hands. Place them on a cookie sheet and press each ball until nearly flat.

Bake them in a preheated 350 degree oven for 8-10 minutes being careful not to over-bake them so that they maintain a soft, chewy texture. Let them cool on a wire rack completely before adding the filling.

For the cream filling, place the shortening and Earth Balance in the bowl of your stand mixer and cream for several minutes until smooth.

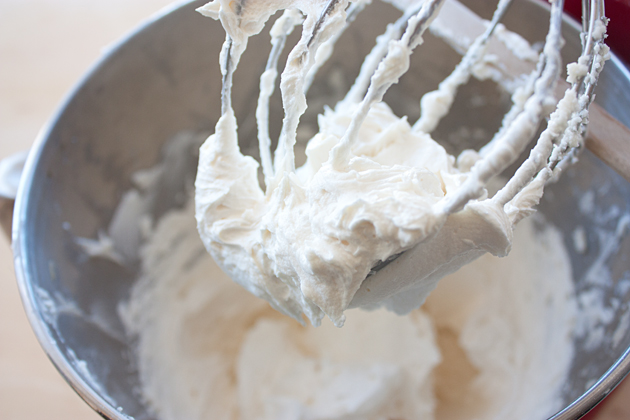
Slowly add the powdered sugar, non-dairy milk, and vanilla and beat on medium speed for several more minutes until light and fluffy.

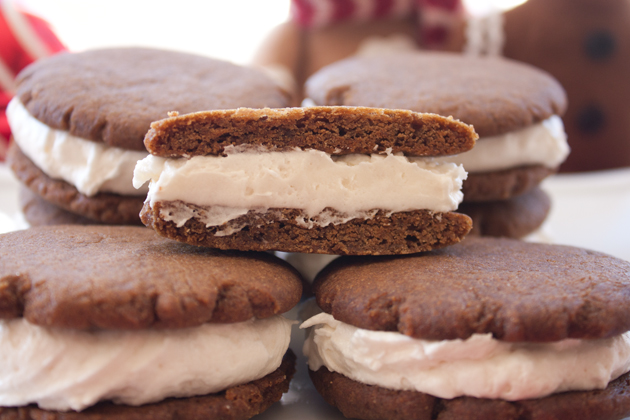
Turn half of the cookies upside down and place large dollops of cream filling evenly on top of each cookie.

Place another cookie on top of each and gently press down.

Vegan Cream-Filled Ginger Molasses Cookies

Cream-Filled Ginger Molasses Cookies

Vegan Cream-Filled Ginger Molasses Cookies

Cookies

  • 3/4 cup Earth Balance, softened to room temperature
  • 1 cup white granulated sugar
  • 1 egg replacer egg
  • 1/4 cup black strap molasses
  • 2 1/4 cups white baking flour
  • 1 1/2 teaspoons baking soda
  • 2 teaspoons ground ginger
  • 1 teaspoon ground cinnamon
  • 1/2 teaspoon ground cloves

Cream Filling

  • 1/2 cup (1 stick) Earth Balance (or other non-dairy, non-hydrogenated margarine)
  • 1/2 cup vegetable shortening
  • 3 1/2 cups powdered sugar, sifted if clumpy
  • 2 teaspoons pure vanilla extract
  • 1/4 cup non-dairy milk (I used almond)

Preheat the oven to 350 degrees.

Wet Ingredients: In a large mixing bowl, cream together the Earth Balance and granulated sugar until well-combined. Add the egg replacer egg and molasses and stir to combine.

Dry Ingredients: Over the same mixing bowl, sift together the flour, baking soda, ginger, cinnamon, and cloves into the wet ingredients. Stir to combine.

Form Cookies: With a cookie scoop (or spoon) portion out the dough and roll each cookie in your hands so they’re a nice even ball. Place them on a parchment-paper-lined cookie sheet 2 inches apart and flatten significantly.

Bake: Place the cookie sheet in the oven and bake for 8-10 minutes. Do not over-bake otherwise the cookies could become hard.

Cream Filling

Combine: With a stand mixer on medium speed cream the Earth Balance and shortening until well-combined. Turn the mixer down to low speed and gradually add in the powdered sugar and continue beating for several minutes. Add the vanilla and non-dairy milk and beat until fluffy—about another 2 minutes.

Assemble: Distribute a large dollop of cream on the bottoms of half of the cookies. Place the remaining cookies on top and gently press down.

Vegan Ginger Molasses Cookies with Buttercream Filling

Football Cut-Out Sugar Cookies

Football Cut Out Cookies

It’s been an exciting, touchdown-filled month for the sales team at my company. For the month of November the other two sales managers and I organized a football/Thanksgiving themed contest across the entire sales department. While there are two football teams, each member contributes individually to their overall team score by the number of yards they gain based on their own sales achievements.

Both groups came up with a team name; The Dee Stroyers (the red and white team) and The Butterballs (green and yellow team). We (the managers) decorated our area and cubes to get everyone in the spirit and created a score board that’s hung up on the wall so everyone knows exactly who’s kicking ass and who needs to be kicked in the ass. 😛  Everyone’s eligible for weekly cash prizes and the MVP for each team will get a PTO day. Who doesn’t love cash and vacations, right?!

Football Cut Out Cookies

In light of the contest and because the holidays always inspire me to bake copious amounts of cookies, I baked football themed cookies for the team this past weekend and made sure to create a jersey for each teammate (12 team members total) with their initials on it.

Despite my mind harboring intense guilt for not spending time playing outside on a sunny, 75 degree day and instead toiling the afternoon away decorating cookies, it was so worth it. Not only was I happy with the results, but I’m also happy to honor the team with some of my own energy and effort considering how much they’ve put in this month.

I’ve actually been making these cut-out sugar cookies at least once a year and realized that I’ve never shared the recipe on my blog so figured that it’s about high time I do so here it goes:

You’ll first want to take your Earth Balance, cream it, then add the granulated sugar and mix it well.

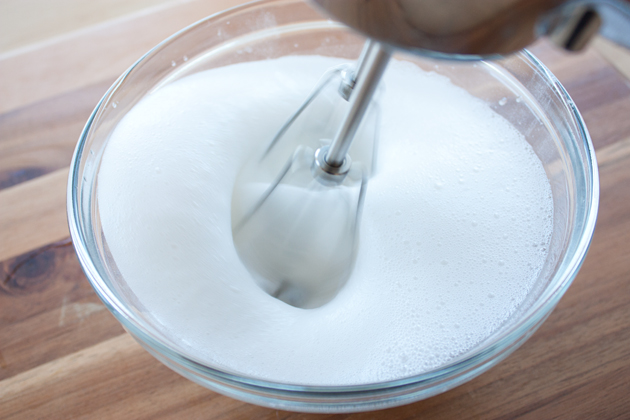
Then put the egg replacer and water in a bowl and beat with a hand mixer on high speed until stiff peaks form. This does take a few minutes, so be patient.

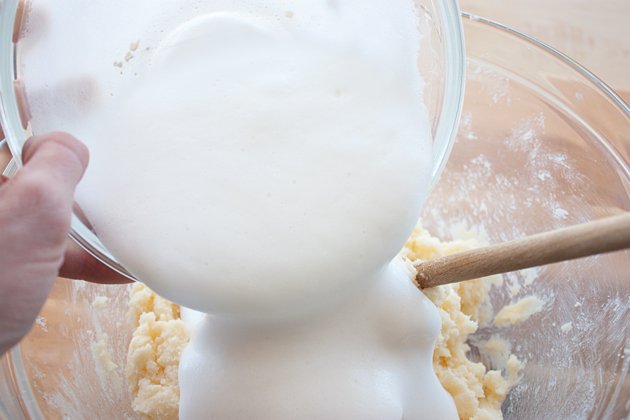
Add the vanilla extract and egg replacer to the batter and mix well.

Add flour, baking soda, and salt and sift it together into the batter.

Mix the dough well and then portion it into four even balls and cover with plastic wrap. Place them in the refrigerator and chill for at least two hours or overnight.

After the dough has chilled, grab your rolling pin and, if you have a 1/4-inch spacer ring, place it on either end of your pin. If you don’t have one, it’s not the least bit necessary—just try to roll out the dough to roughly 1/4-inch think or more. I would not roll it out thinner as thicker cookies are essential for tastiness. To start, place the dough between two sheets of wax paper and start to smush it down with your hands. It will start to soften and become more pliable; then take the rolling pin to it.

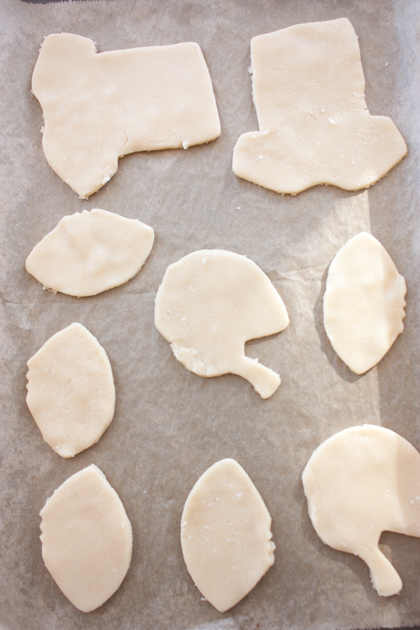
Place the cookie cutters over the dough and press down, trying to maximize your cookie-packing pattern so that you don’t have to roll it out as many times. Ever so carefully peel the cut-outs from the wax paper and place them on a parchment covered baking sheet.

Cookie Cut Outs Pre Baked

Place the cookie sheet in a preheated 350 degree oven for 8-12 minutes or until the bottoms are just barely starting to brown. I prefer under-baked to over-baked sugar cookies.

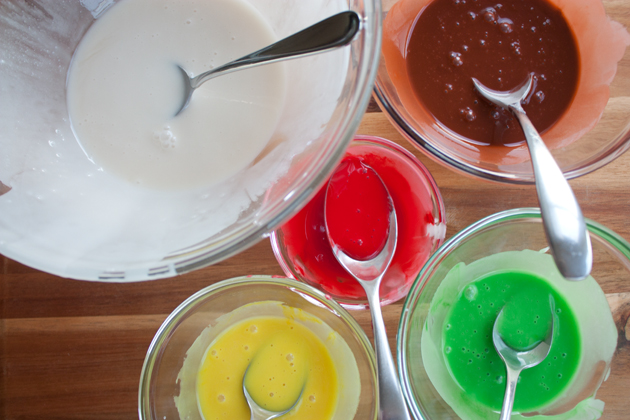
After you’ve rolled out and baked all of the cookies, you’re ready to begin making the icing. To do this, place 3 cups of sifted powdered sugar in a bowl, add the non-dairy milk and vanilla. Stir well until you achieve a drippy (but not too runny) consistency, like you see in the photo above on the right.

Portion the icing into as many bowls as colors you’re planning to use and then add your food coloring and mix well.

Frost the cookies and enjoy! And one quick tip—if you plan to layer the colors on top of each other like I did, I recommend waiting for the first color to completely harden before adding another, otherwise you risk the colors running together (unless you’re going to swirl them to create interesting patters).

Football Cut Out Cookies

Vegan Cut-Out Sugar Cookies

(I made alot of cookies since we have a lot of employees, but if you’re just making it for a small family, I’d cut this recipe in half… unless, of course, you enjoy having copious amounts of cookies around to enjoy during the holidays.)

Cookies

  • 1 1/2 cups Earth Balance
  • 2 cups granulated white sugar
  • 4 egg replacer eggs
  • 1/2 teaspoon vanilla
  • 5 cups white baking flour
  • 2 teaspoons baking powder
  • 1/2 teaspoon salt

Icing

  • 3 cups powdered sugar, sifted if clumpy
  • 1 1/2 teaspoons pure vanilla extract
  • 2 to 5 tablespoons (or more) non-dairy milk (I used vanilla unsweetened almond)

Preheat oven to 350 degrees.

Wet Ingredients: In a large mixing bowl cream Earth Balance and sugar. Add egg replacer and vanilla and mix well.

Add Dry Ingredients: Add sifted flour, salt, and baking powder. Combine to form the dough.

Prepare Dough: Section the dough into 4 even balls, cover with plastic wrap, and allow to chill in the refrigerator for at least 2 hours or overnight.

Cut Out Cookies: Roll the dough to a desired thickness (but don’t go thinner than 1/4 inch) and use cookie cutters to form shapes.

Bake: Place the cookies on a parchment-paper-lined cookie sheet and bake for 8-12 minutes or until they start to brown slightly. Cool on a wire rack before frosting.

Frosting: Place all ingredients in a bowl and stir to combine. Add more milk for a thinner consistency and less for a thicker, frosting-like consistency. Portion out the icing into as many bowls as colors you wish to use and add food coloring.

Assemble: Frost your cookies and enjoy!

Football Jersey Cut Out Sugar Cookies

GMO-Free Corn Millet Cakes with Basil Avocado Salsa

Organic Corn Millet Cakes with Corn Avocado Salsa

While there were so many awesome victories at the ballot box last Tuesday (go Maine, Maryland, and Washington!!), there is one loss that I’m absolutely heartbroken about. All week long my heart has been sinking in sadness, my pulse has been fired up in anger, and my brain has been struggling to sort out how Proposition 37 did not pass.

Organic Corn Millet Cakes with Corn Avocado Salsa

Prop 37 would have simply mandated the labeling of foods containing Genetically-Modified Organisms (GMO’s) in the exact same way that we all are able to currently enjoy the mandatory labeling of nutrition facts and allergen information on packaged goods. I don’t know about you, but I love being able to see exactly what is in the food I’m purchasing. It allows me, not only as a consumer, but more importantly as a person fueling my body, to make informed decisions. I just can’t wrap my head around why anyone would vote against a proposition where the outcome merely allows them to make more-informed choices. Why would anyone choose ignorance?

It’s particularly embarrassing knowing that 51 other countries all over the world—including Japan, all of the EU, Russia, and even China—require GMO labeling on packaged goods. Why does it always feel like the US is the last country to make smart, forward-thinking decisions?

Corn Millet Basil Cakes with Corn Avocado Salsa
And then I have to remember that Monsanto, DuPont, Dow, and many other chemical companies spent over 1 million dollars a day on misinformational advertising campaigns confusing the public. It really just confirms how much our country is run by media, advertising, and corporations because, prior to their huge ad push, the polls were showing a large majority voting in favor of Prop 37.

While I feel this sense of dread pulsing through my body in these moments following defeat, I know that I need to find ways to cultivate these uncomfortable feelings into something constructive. This makes me realize I need to do more of my part at educating the public on issues like this.

Corn Millet Cakes with Corn Avocado Salsa

These GMO-free corn millet cakes are my salute to all of the hard work that went into getting Prop 37 on the ballot this year. I chose corn as my focus because up to 85% of all corn grown in the US is genetically engineered making it one of the most prevalent GMO crops in the country, and until companies start labeling GMO ingredients, the only way to be sure you’re not buying GMO corn is to buy organic corn.

Millet Cake Ingredients

When you see the ingredients above you realize just how easy these millet cakes are to put together.

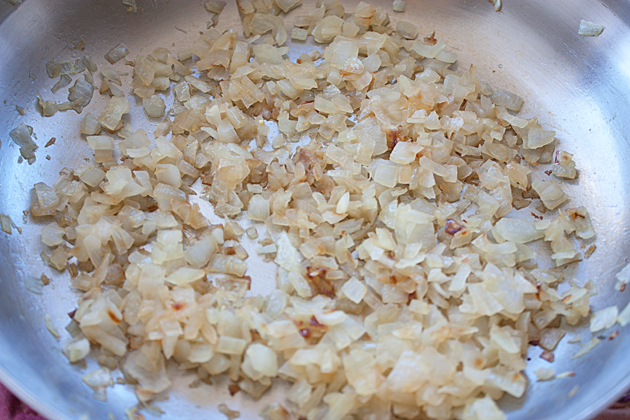
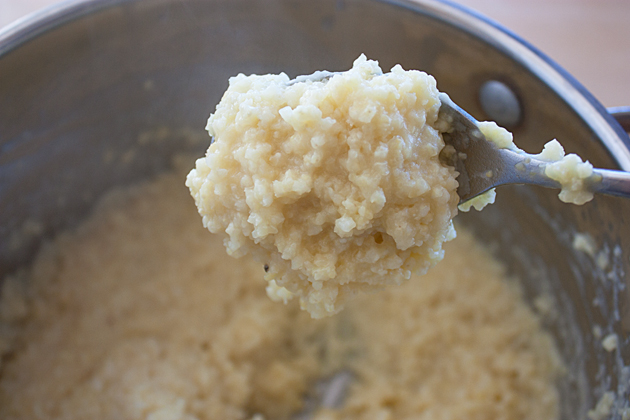
First, heat about a tablespoon of olive oil in a medium sauté pan and then add your diced onions. Sauté them for about 10 minutes or until translucent and just starting to brown. Meanwhile, bring the 4 cups of water to a boil in a medium pot and then add the salt, a tablespoon of oil, and millet. Then, while stirring with a wire whisk, slowly add the corn grits. Simmer on medium-low heat uncovered for 25 minutes or until all water has been absorbed and the millet is sticky like the above-right photo.

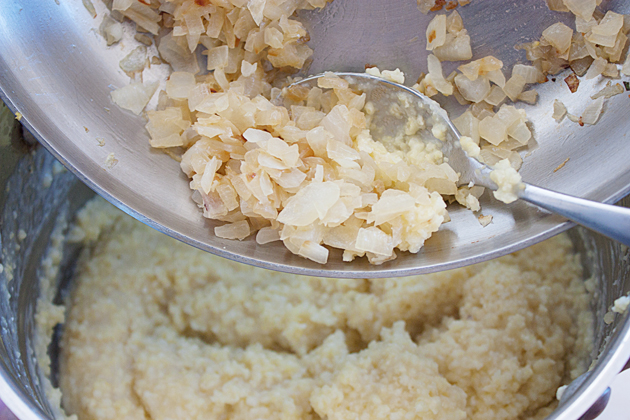
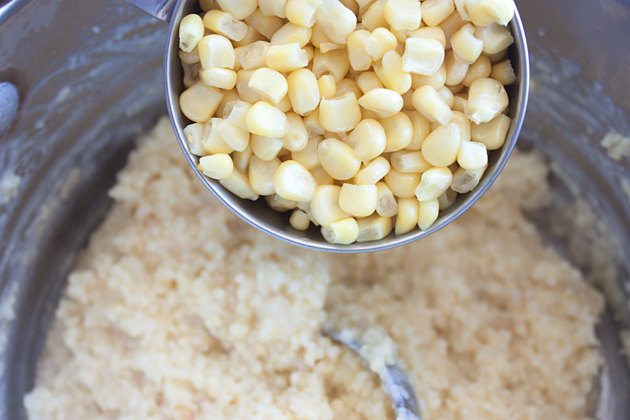
Add the sautéed onions, corn kernels, and basil to the millet mixture and stir well.

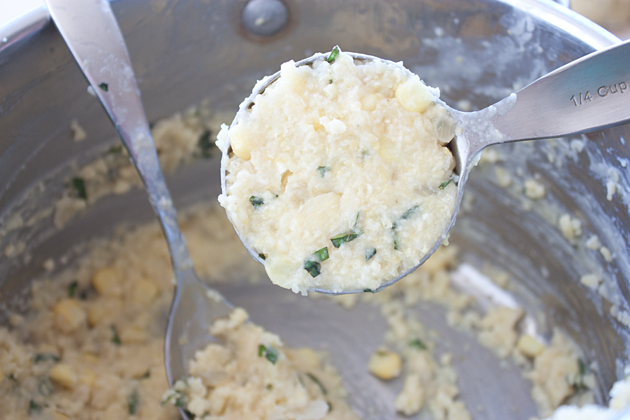
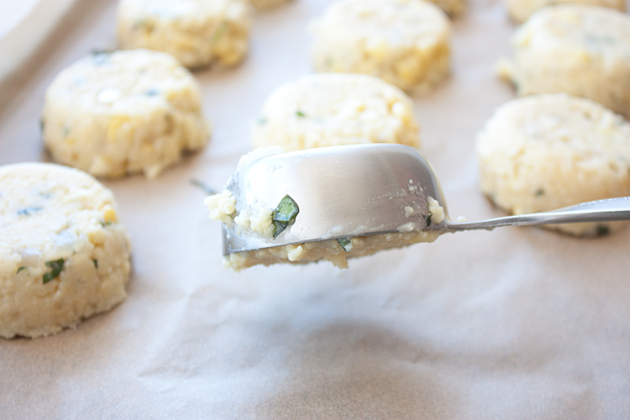
Using a measuring cup, cookie scoop, or any other shape you want to make your cakes, form them and place them on a parchment paper-lined cookie sheet. Tip: I always dip my measuring cup in an ice cold bowl of water between forming each cake. It helps to keep the cakes from sticking to the scoop.

Corn Millet Basil Cakes

After forming all of your cakes, place the cookie sheet in the oven and bake for 25 minutes or until slightly crisp and golden on the outside.

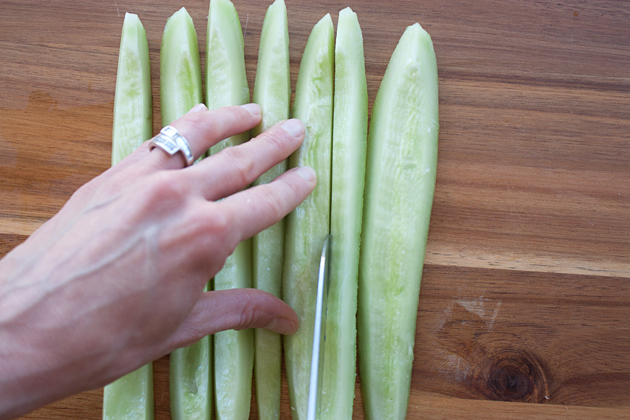
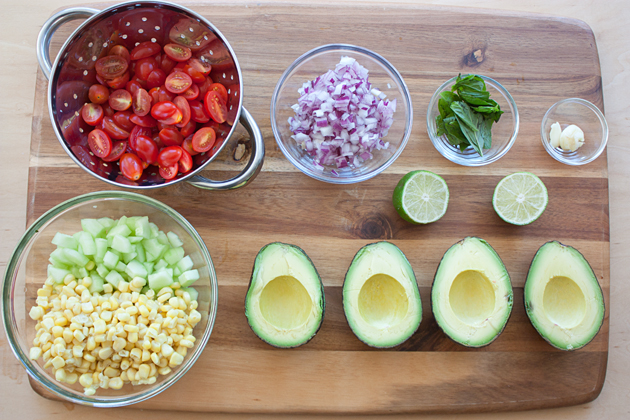
While the cakes are baking, put together the salsa by peeling, deseeding, and chopping your cucumbers.
Organic Corn Avocado Salsa

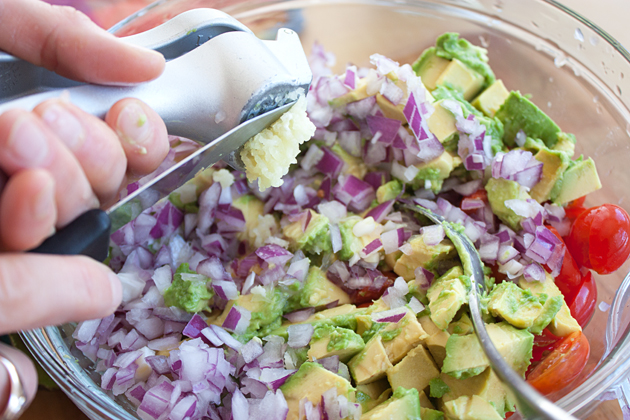
Chop your red onion and slice the grape tomatoes.

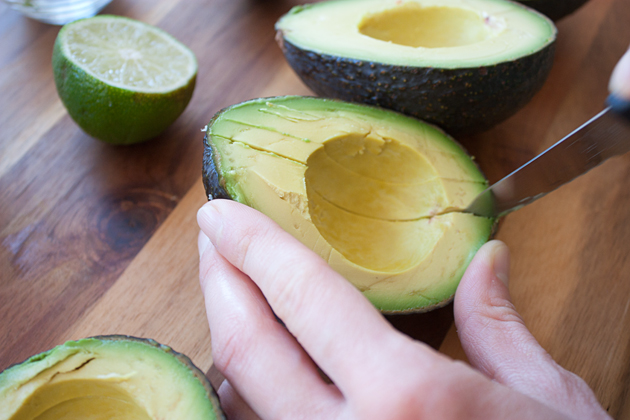
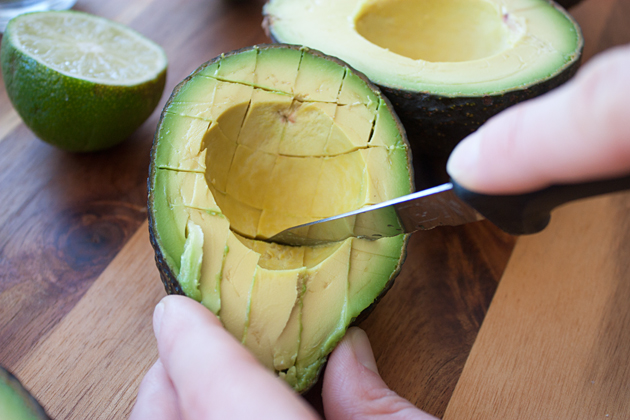
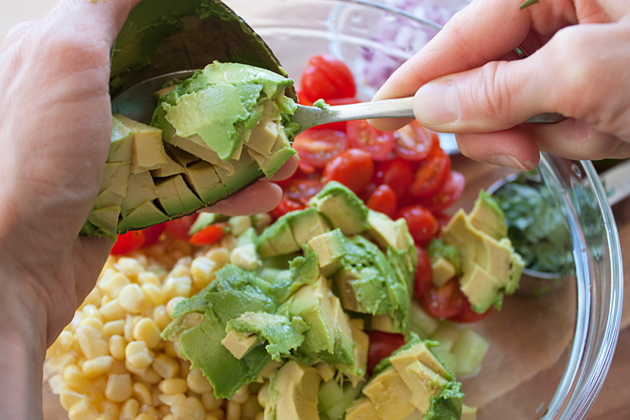
Prep your  avocados by running your knife down the inside lengthwise and then doing the same thing crosswise to create little squares in the avocado.

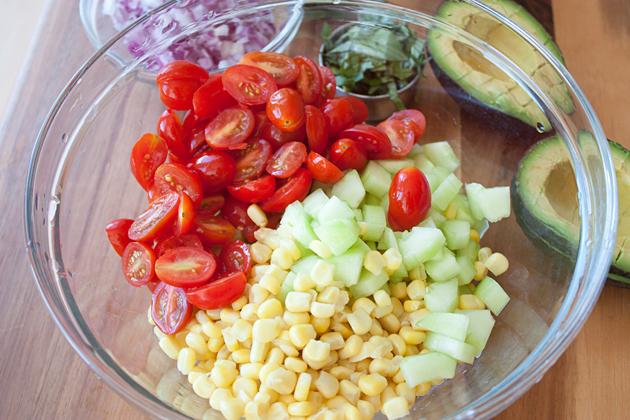
Add your sliced tomatoes to the bowl and then scoop the avocado out of it’s shell.

Squeeze the lime and press the garlic into the bowl.

Mixing Corn Avocado Salsa

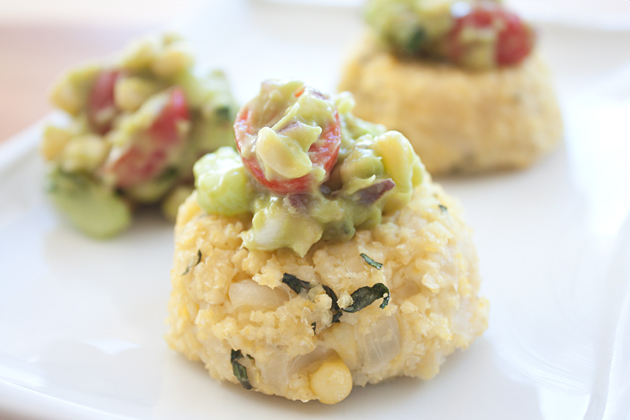
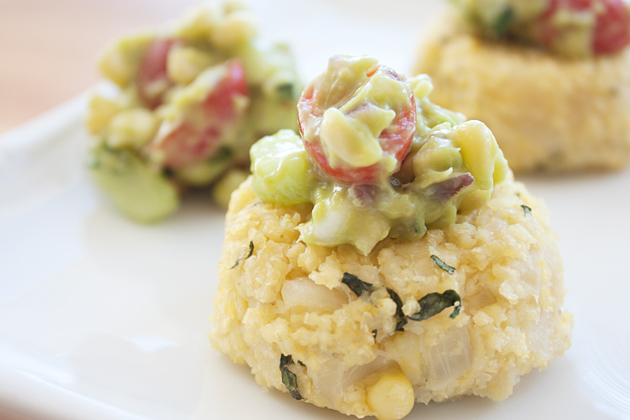
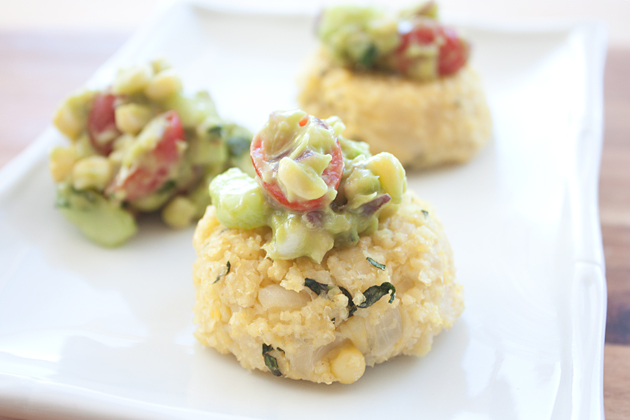
Lastly, add the tomatoes, chopped basil, and salt to taste and then mix it until well-combined. Place the millet cakes on a plate with a heaping dollop of salsa on top.Corn Millet Cakes with Corn Avocado Basil Salsa

GMO-Free Corn Millet Cakes with Basil Avocado Salsa

Corn Millet Cakes

  • 4 cups water
  • 1/2 teaspoons salt
  • 2 tablespoons olive oil
  • 3/4 cup millet, rinsed
  • 1/4 cup organic corn grits (polenta)
  • 1 yellow onion
  • 1 cup frozen organic corn, thawed
  • 2 heaping tablespoons basil, chopped

Basil Avocado Salsa

  • 2 medium avocados, chopped
  • 3/4 cup frozen organic corn kernels, thawed
  • 1 heaping cup sliced grape tomatoes (about 40 grape tomatoes)
  • juice of 1 lime
  • 1/2 medium red onion, finely diced
  • 1 medium cucumber, deseeded and chopped
  • 2 cloves garlic, pressed
  • 1/4 cup basil, chopped
  • salt, to taste

Preheat the oven to 350 degrees.

Sauté Onions: Heat a tablespoon of olive oil in a medium sauté pan and then add your diced onions. Sauté them for about 10 minutes or until translucent and just starting to brown.

Cook Millet: Meanwhile, bring 4 cups of water to a boil in a medium pot. Add the salt, a tablespoon of oil, and the millet. Then, while stirring with a wire whisk, slowly add the corn grits whisking out any lumps as they form. Whisk well then simmer on medium-low heat uncovered for 25 minutes or until all the water has been absorbed and the millet is sticky. Stir occassionally as the millet and corn grits cook to prevent them from sticking to the bottom of the pan. As the end of cooking time nears you’ll want to stir more frequently.

Form Cakes and Bake: Add the sautéed onions, corn kernels, and basil to the millet mixture and stir well. Using a 1/4 cup measuring cup (this is what I used), cookie scoop, or any other shape you want to make your cakes, form them and place them on a parchment paper-lined cookie sheet. Keep a bowl of ice-cold water nearby and dip your measuring cup in it between forming each cake. I’ve found that this help to prevent the millet from sticking to the cup.

Mix Salsa: Place all ingredients (except salt) into a bowl and stir to combine. Add salt, to taste, and stir again.

Serve: Place the millet cakes on a plate with a heaping dollop of salsa on top and serve warm as an appetizer. Enjoy!

GMO-Free Corn Millet Cakes with Corn Avocado Salsa

Vegan Lime Cheesecake Bars

Vegan Cheesecake Lime Bars

These tasty little lime bars are such a great hot weather treat. With minimal baking required (only a few minutes in the oven for the crust), you don’t need to be slaving over a hot kitchen in the middle of summer’s heat to whip up a batch of these insanely delicious treats! Plus, they’re super quick and very easy to put together.
Vegan Cheesecake Lime Bars

As for the taste—who can resist that delicious, creamy consistency coupled with the fresh and light flavor of lime? Not many, apparently, as I’ve served these bars at several potlucks now and the pan has never failed to come home empty. And the craziest thing about these cheesecake bars is that they consistently fool unsuspecting people who have no clue that they’re vegan.

So here’s how you too can enjoy this creamy, delicious, lime bliss.

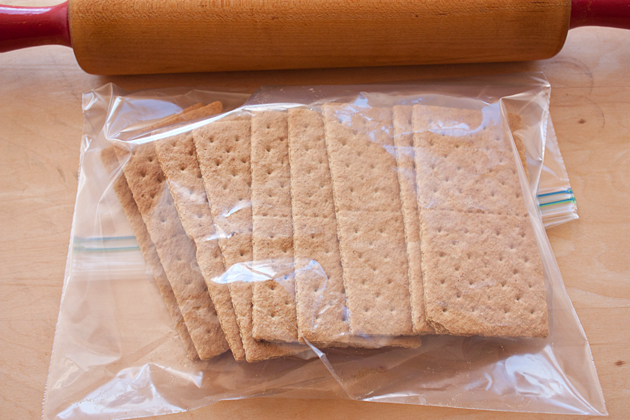
You’ll first want to crush your 12 graham crackers. You can do this the easy way by putting them in a food processor and processing until crumbly, or you can do this the fun way by putting them in a Ziploc bag and crushing the hell out of them with a rolling pin. I chose the latter… mostly so that I didn’t have to wash and dry my food processor bowl to make topping. Lazy? Smart use of time? Yep, exactly.

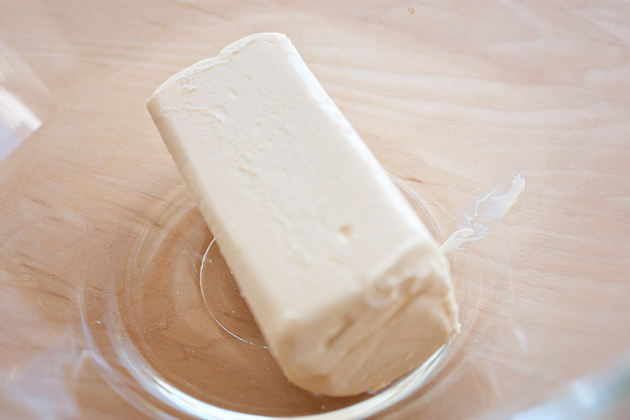
You then want to melt your Earth Balance in the microwave. It took me somewhere between 30 seconds and 1 minute on high to melt completely.

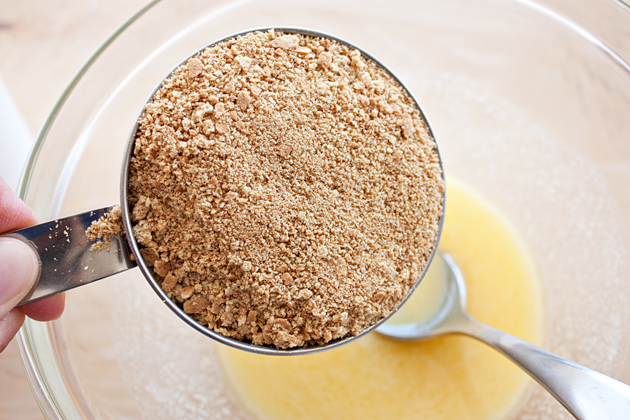
You’ll then add the granulated sugar, graham cracker crumbs and stir to combine until everything is well incorporated.

Pour the mixture into your 9×9 (or even an 8×8—you’d just end up with slightly thicker bars) pan and press it down firmly to form the crust. Place it in your preheated 350 degree oven and bake for 8 minutes.

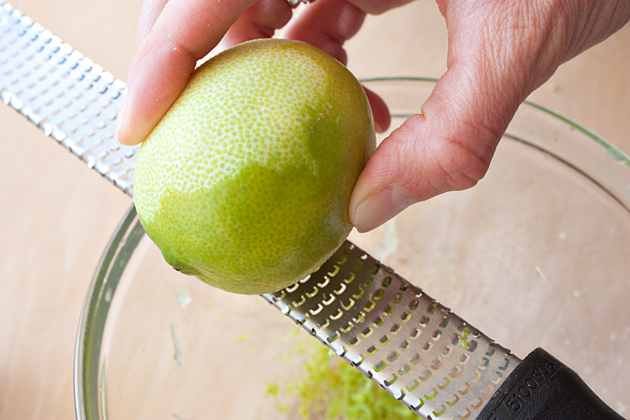
While the crust is baking, squeeze your limes and grate the zest. Set them both aside.

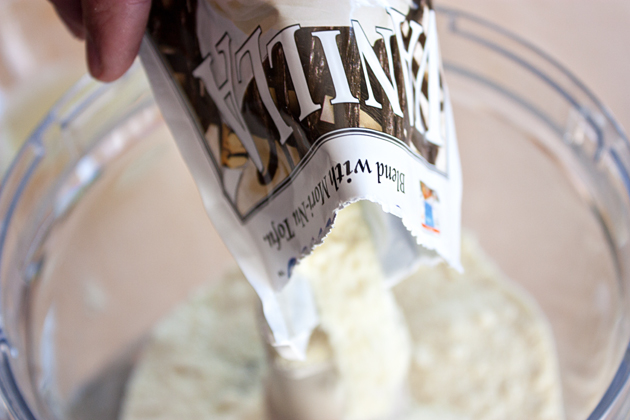
Add the pudding mixture to your food processor along with the block of tofu, lime juice, and lime zest.

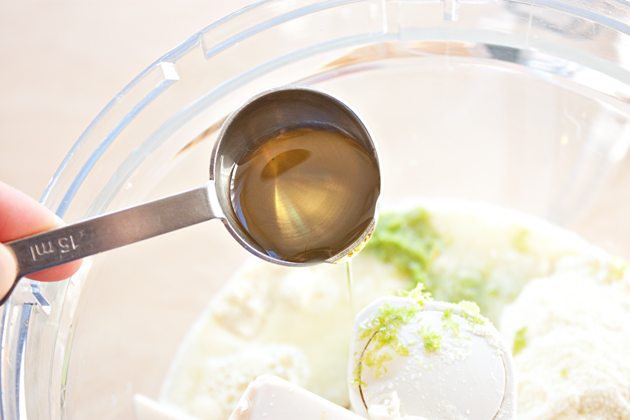
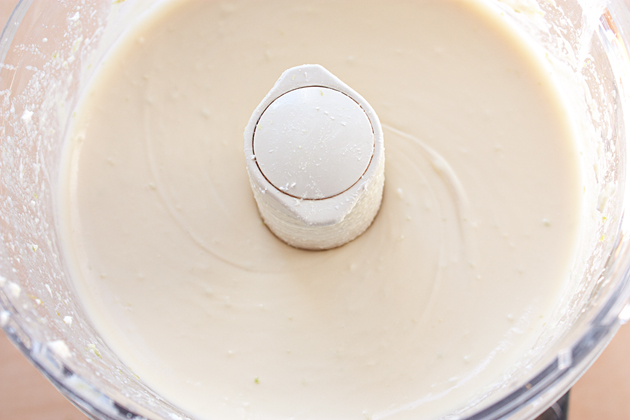
Add the agave (or other liquid sweetener) and puree. Finally, add the Tofutti cream cheese and puree until smooth again.

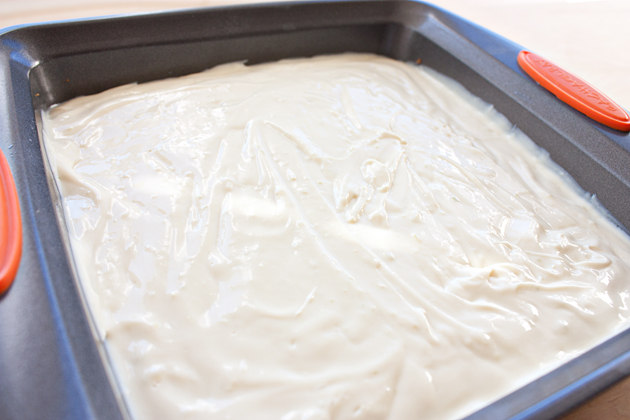
Pour the creamy topping on the baked (and cooled) crust.

Spread it evenly with a spatula and then shake it so that it’s flat and well distributed. Place it in the refrigerator and let it chill for 2-3 hours before serving. Lastly, cut it into bars or squares and enjoy!

Vegan Cheesecake Lime Bars

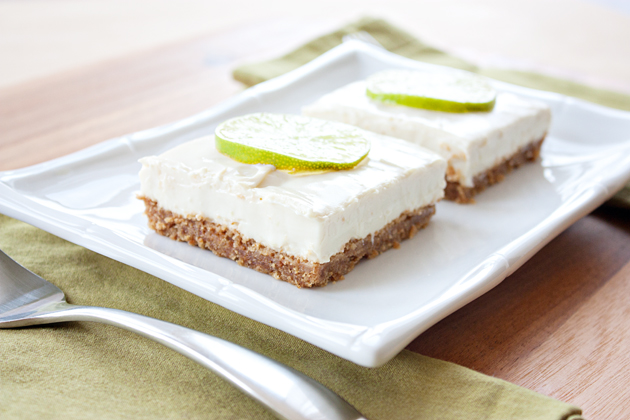
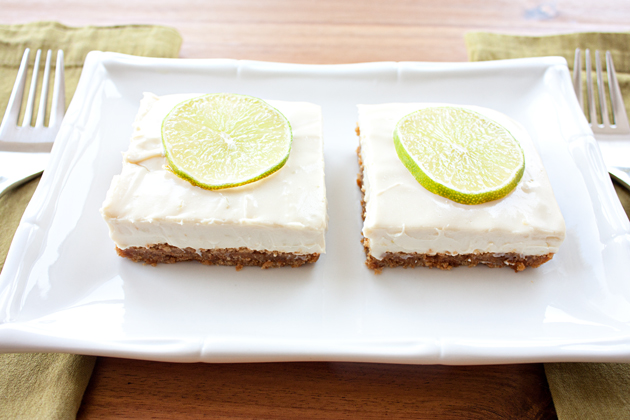
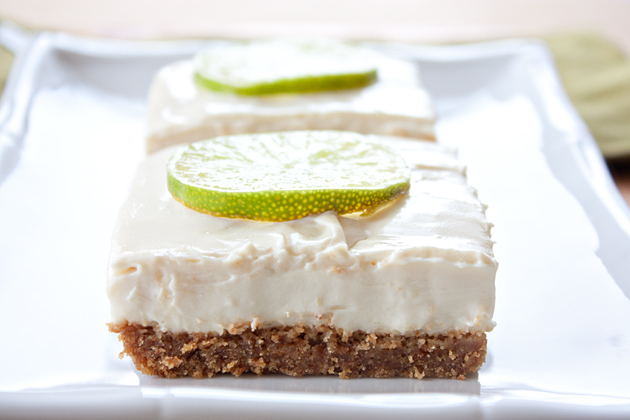
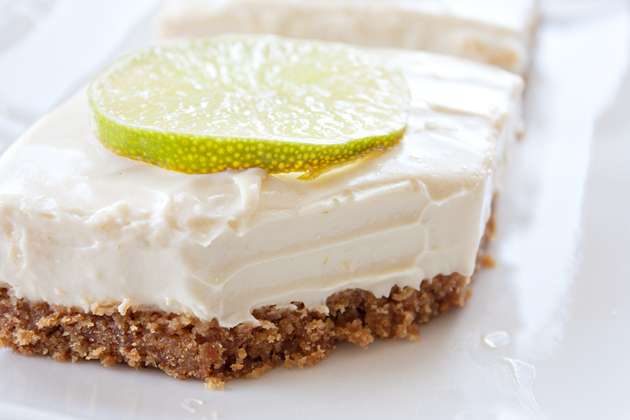
I added a slice of lime on top for decoration, but I could see adding lime zest as well, or sticking with no garnish as they’re just as pretty plain.

Vegan Cheesecake Lime Bars

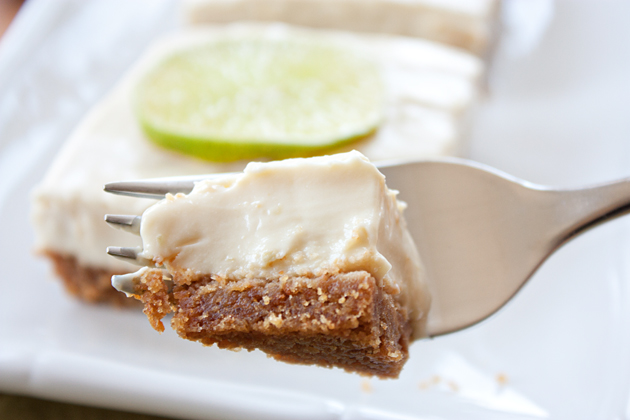
YUM! Seriously, so good!

Vegan Cheesecake Lime Bars

Vegan Lime Cheesecake Bars

Crust

  • 2 cups crushed vegan graham crackers (this is exactly 12 crackers and Nabisco Original Grahams, in the red box, is the only brand I’ve been able to find that does not have honey)
  • 1/2 cup (1 stick) Earth Balance, melted
  • 2 tablespoons granulated sugar
Filling
  • 1 12 oz. package firm silken tofu (I used Mori-Nu that are found in aseptic packages and don’t need refrigeration)
  • 8 oz. Tofutti cream cheese (1 container), softened to room temperature
  • 1/2 cup fresh squeezed lime juice
  • zest from 1 lime
  • 2 packages Mori-Nu vanilla pudding mix
  • 1 tablespoon agave syrup (or other liquid sweetener of your choice)

Preheat oven to 350 degrees.

Crust: Combine graham cracker crumbs, melted butter, and sugar in a medium bowl. Pour the mixture in a 9×9 baking dish (if the pan isn’t non-stick, you may want to grease it first) and press down firmly to form a crust. Bake for 8 minutes and then set on a wire rack to cool.

Filling: Blend the silken tofu, lime juice, lime zest, pudding mix packets, agave, and Tofutti cream cheese in a blender or food processor until smooth. Pour over cooled crust and chill in the refrigerator for 2-3 hours before cutting into squares and serving.

Vegan Cheesecake Lime Bars

Roasted Sesame Seed Hummus (in the Blender)

Toasted Sesame Seed Hummus

A while back one of my readers who has a severe nut allergy asked whether I knew of a completely peanut- and tree nut-free brand of tahini. Gosh! I had no idea that tahini was often contaminated with nuts so I checked my jar (I believe this particular jar was Once Again) and sure enough the label said, “CONTAINS SESAME SEEDS.” Duh! But the finer print underneath that said “Manufactured in a facility that also processes peanuts and soy, and on equipment that processes other tree nuts and seeds.” Interesting. And a bummer for those with very sensitive nut allergies because I would have thought that seed butters are the perfect replacement for nut butters in those cases, but apparently that’s not so.

Roasted Sesame Seed Hummus

To add salt to the allergy suffers’ wounds, tahini adds a certain richness to hummus that you just can’t achieve when it’s omitted or even swapped out for olive oil. It’s not just the fat content in tahini, but also that thick paste-like consistency that gives hummus a deliciously smooth and rich consistency.

So my solution to all of the dear nut allergy sufferers of the world who want to have their hummus and eat it too, is to toast your own sesame seeds and essentially make your own tahini by adding them to a blender (note: not your food processor) along with your other hummus ingredients. Glorious sesame paste without the allergy can be achieved!

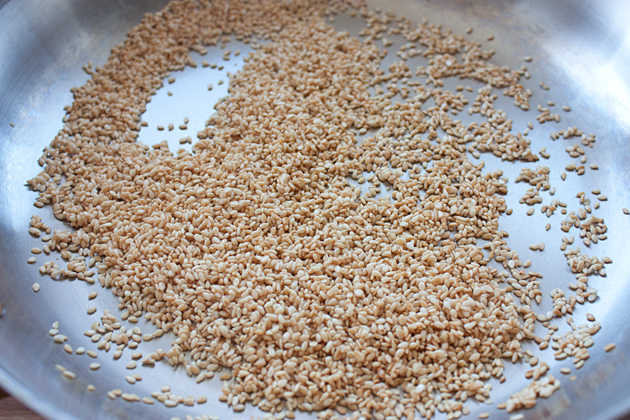
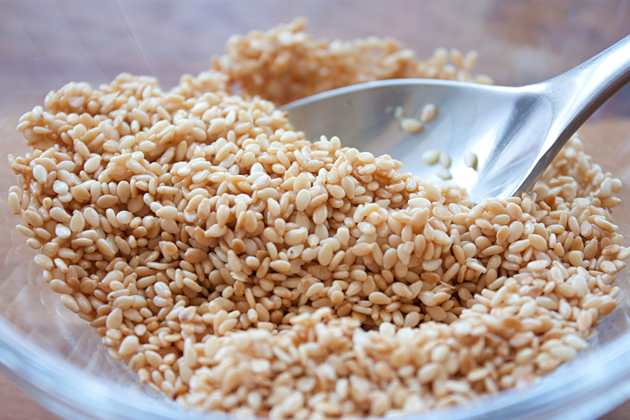
First you need to toast your sesame seeds in a medium skillet over medium heat. Shake the pan and stir the seeds with a wooden spoon so that all of them are evenly roasted. Once they’ve browned and become fragrant immediately remove them from the heat and empty into a heat-proof bowl or plate.

Hummus Ingredients

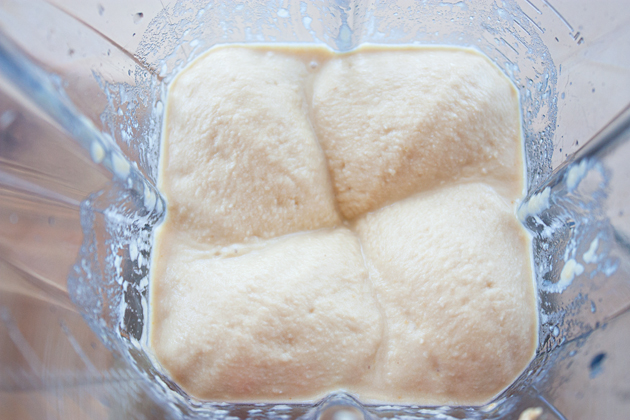
Then take all of your hummus ingredients and empty them into your blender and whirl away. Add small amounts of water at a time until you achieve that perfect hummus consistency. Finally, add salt at the very last step.

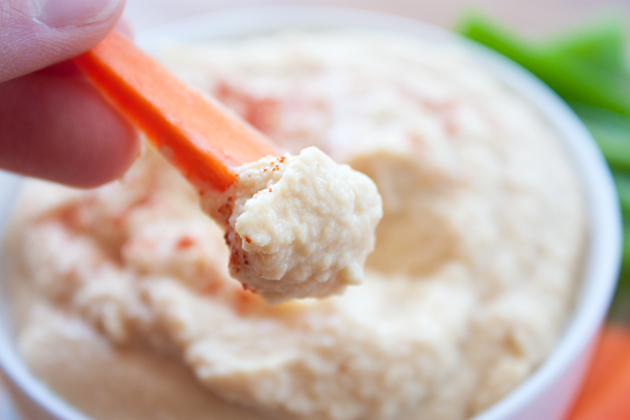
In comparison to regular ‘ol tahini hummus, this version has a much stronger sesame seed flavor. In fact, I was pretty floored by how much more flavor it added and it was a flavor that I absolutely loved. However, if it’s too strong for you or if you don’t like that roasted flavor you could add the sesame seeds raw, too. Even though I haven’t personally tested this, it should work in theory.

Toasted Sesame Seed Hummus (in the blender)

Ingredients

  • 2 cans cooked chickpeas
  • 1-2 lemons, juiced (I used 1 1/2 of the lemons pictured above. They were rather sizeable and provided a ton of lemony flavor to the hummus. I would start with one lemon and add more if you like it lemonier)
  • 1 clove garlic, peeled
  • salt, to taste
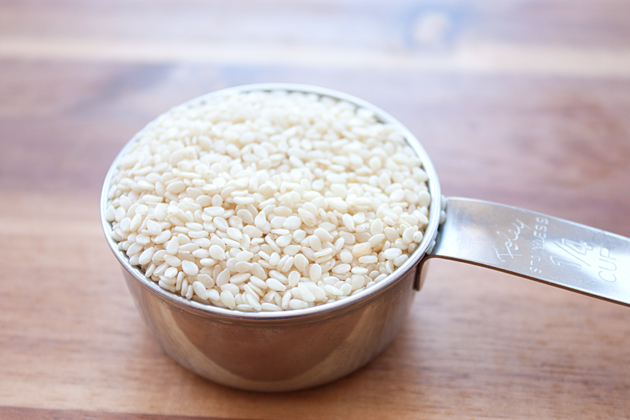
  • 1/4 cup raw sesame seeds, toasted (see below instructions)
  • water, as needed (I used roughly 3/4 of a cup, but you may want more or less so add in small amounts at a time)

Toast Sesame Seeds: Pour your 1/4 cup of sesame seeds into a medium skillet over medium heat and cook for about 3-5 minutes. You’ll want to shake and stir the pan very frequently whiling cooking so that they are evenly roasted. They’ll become fragrant and slightly brown when done. Immediately empty the sesame seeds into a heat-proof bowl or onto a plate to stop the cooking.

Blend it All Together: Add the chickpeas, lemon juice, garlic, sesame seeds, and 1/4 cup of water to your blender. Continue to add water in small amounts to the blender until it reaches the consistency you desire. Then add salt. Again, start in small increments and keep adding until you’ve achieved the perfect-to-your-tastes saltiness.

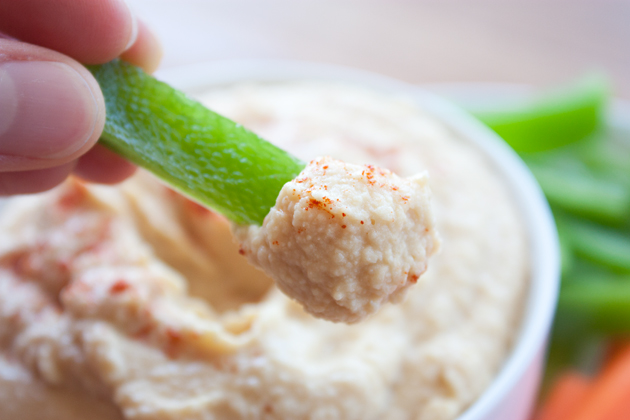
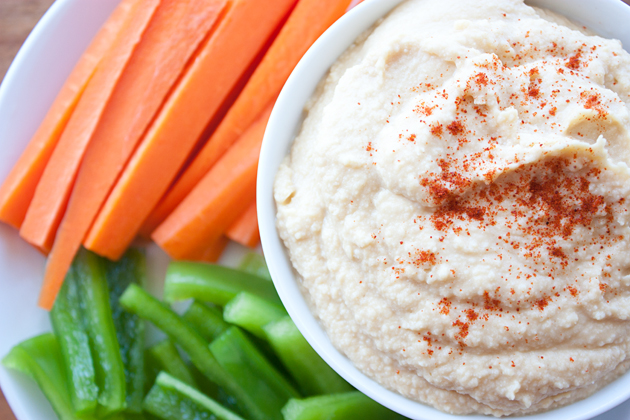
Serve with fresh cut veggies, pita, or on a sandwich or wrap. Also, if you’re serving this to a crowd you may want to add a dusting of paprika for garnish.

Toasted Sesame Seed Hummus